Magnetic Semi Flexible Solar Panels
Solar panels are an excellent way to reduce carbon emissions. They are also ideal for generating power in remote locations.
The goal of this project is to create a lightweight, easy to store and deploy solar array for off grid use in a camper van. It must be powerful enough to provide power to lights, laptop, batteries and an entertainment system. The panels need to be easy to install and remove for use elsewhere and safe storage.
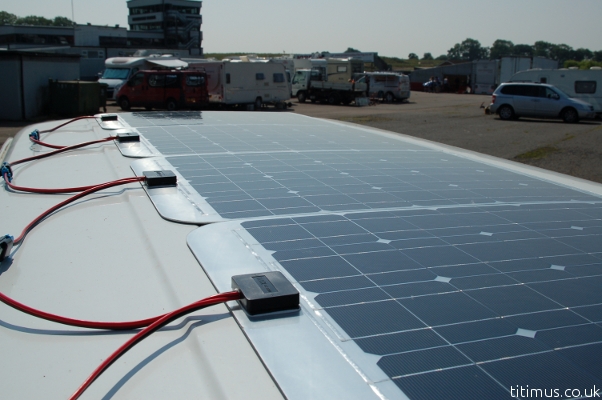
The cheapest lightweight and durable panels seem to be the aluminium backed and laminated monocrystalline type. The plan for fixing the panels to the roof of the vehicle is with adhesive backed magnetic sheet. Four 50w panels are wired in parallel and connected to an auxiliary battery via a solar charge controller.
Lensun vs Sinosola
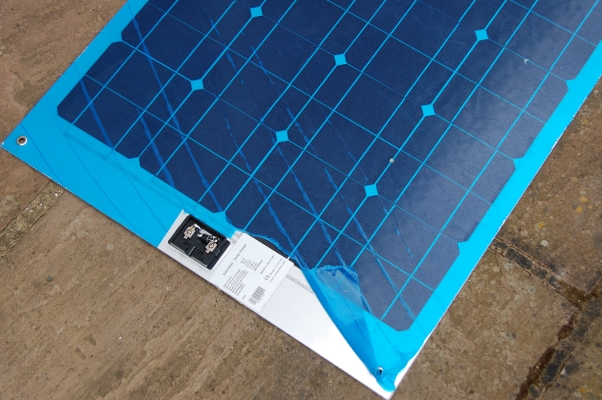
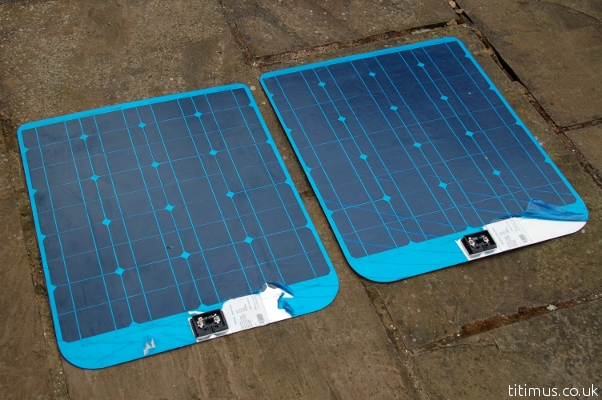
Two brands of the same aluminium backed semi flexible panels were tested: Lensun and Sinosola, both bought through eBay. Sinosola was the preferred choice as they are cheaper, more powerful, smaller and more versatile. The Lensun panel came pre-wired with a bonded cover whilst the Sinosola came un-wired with screw terminals, making it easier to wire as required.
When tested side by side a 50w Sinosola made 93% of the power a 60w Lensun made. If the 60w Lensun was truly 60w, that would make the 50w rated Sinosola actually 56w. An advantage of the Lensun panels is their light weight, which becomes a disadvantage in robustness. On delivery the Lensun panel had a bend in it which could not be straightened without risking further damage. For this project it is crucial that the panels lay as flat as possible to allow the magnets to do their work keeping the panels anchored in high winds. Since the cells inside the Sinosola panels are closer together it makes for an overall smaller panel.
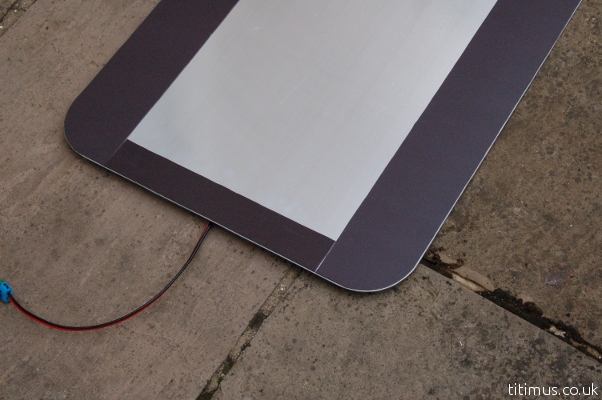
Cutting and Preparing the Panels
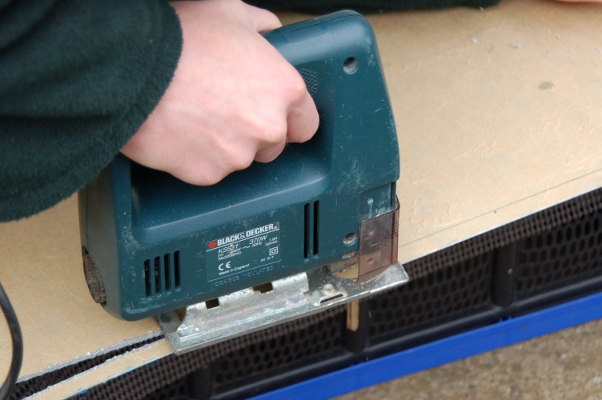
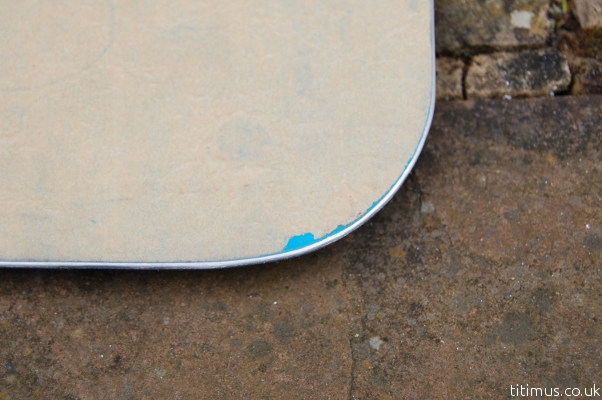
The panels come with eyes for screwing or tying down which need to be removed as they will interfere with the magnets. All corners are cut round to prevent scratching paintwork and to remove the eyes. A small amount is also cut from three sides to slim them down as much as possible. After careful marking up, a jigsaw with a metal cutting blade is used.
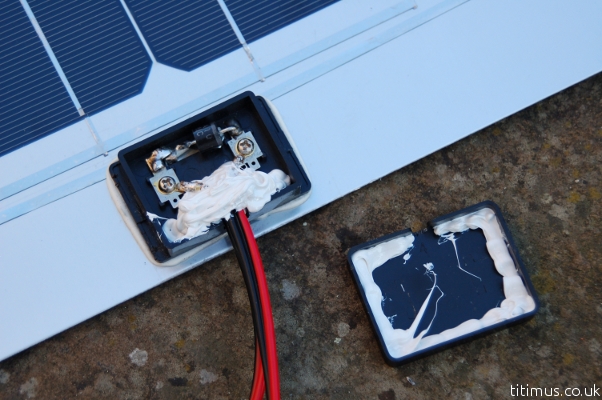
Wiring
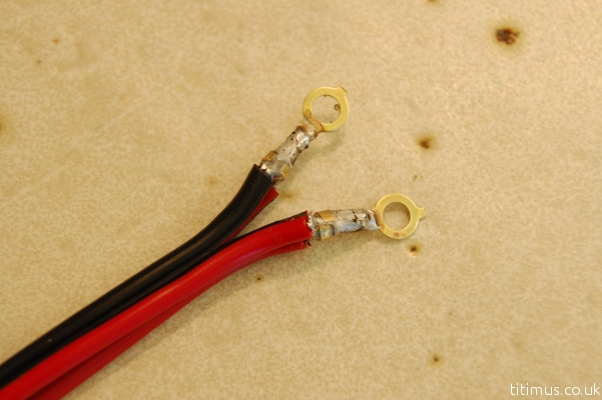
Ring terminals are soldered to 15 amp cable. In total there are four 50w panels connected in parallel making a 200w array. During previous tests it was found that in the best conditions the panels will only put out around two thirds of their rated power, so 15a cable is adequate and makes connecting four wires to the junction box easier.

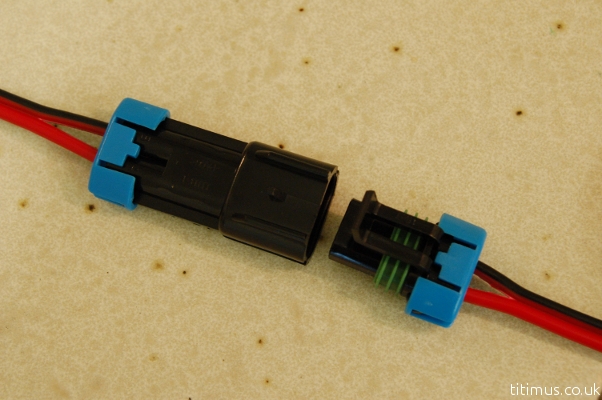
20a automotive waterproof connectors are soldered to the other end of the wires, a male and female on each panel. To allow the wires to fit snugly into the junction box a small amount of plastic is removed to widen the opening. Ring terminals are then screwed in using a small amount of thread lock. Cable ties are super glued round the wires to act as strain relief. To ensure the junction boxes are water tight, silicone adhesive is applied before snapping the covers on. Care must be taken if covers need to be removed during testing as the small plastic retaining clips are easily broken.
Magnetic Fixing
1.5mm self adhesive magnetic sheet is applied to the back. After use in both freezing and very hot conditions the magnets remain securely attached. The key to a good bond is to make sure the mating surface is absolutely clean. If contamination is suspected, a solvent should be used to clean it (aftershave also works well). Keeping things warm helps too.
In Use
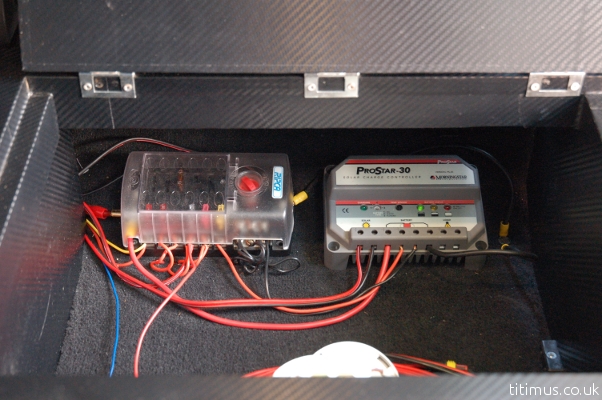
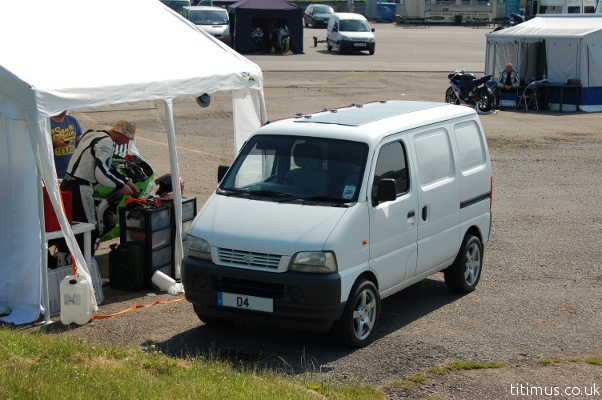
The solar array in use at Mallory Park providing the Team Titimus van with power. There is enough to run the stereo on full blast and recharge the battery after an evening's entertainment. The van also provides LED lighting for the gazebo when needed. More information on the van can be found on the Suzuki Carry camper page.
Power Output Results
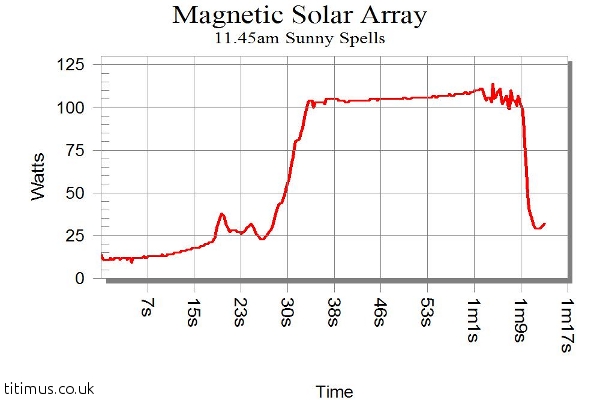
The graph shows a short log of the array using a Medusa Power Analyzer Pro. Lots of small clouds were moving quickly across the sky creating short sunny spells. It was around 11:45am on the 11th of August so the sun was high in the sky.
The effect of poor light conditions can be clearly seen in the first 30 seconds of the graph. The entire array only produces 10w in overcast conditions, as expected with all solar panels. As the cloud clears the wattage shoots up to around 110 watts. Not the 200 watt rating of the panels but still a good amount of energy. During testing a short peak of 126 watts was observed, which is getting close to the expected peak power of two thirds of the manufacturer's claimed rating. This proves that the 15 amp cable used was sufficient.